You need to have:
1. DeviceBit E-KIT(X1) with quick-plug-shield

2. Si7021 Sensor

3. An account on DeviceBit.com (http://www.devicebit.com/home/login)
You need to get these things ready:
1. Add 2 sensors on the website. One is the temperature sensor, and the other is humidity sensor just below your device “01”, and remember to untick Yes (set your device’s “controllable” to “No”), because we’ll not control our device at this moment. Edit their ID to “T1” and “H1” respectively, for we will need them in our codes later.
.jpg)
.jpg)


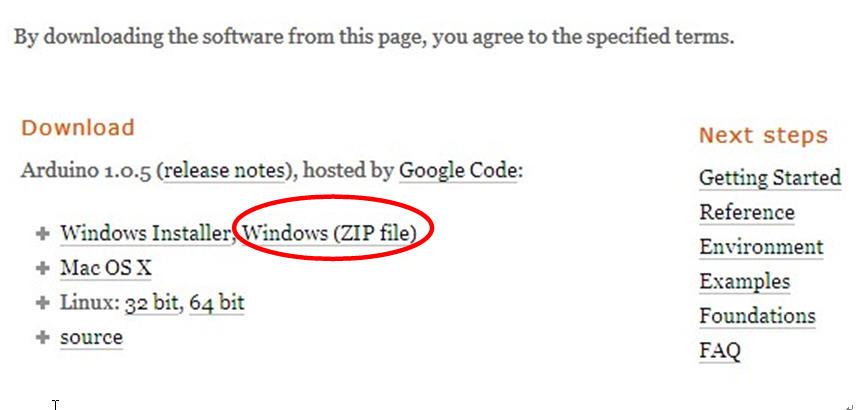
2. Download the arduino IDE from www.arduino.cc. Remember to select the version 1.0.5, not the latest version 1.5.0 by now.
3. Plug E-KIT to usb port and install the drivers using the Arduino UNO .
OK, here comes the tutorial.
1. 1. Download 2 libraries from github.com for free:
https://github.com/DevicebitDemo/DeviceBitHttpClient
https://github.com/yangbo1979/si7021
Put them to your arduino library directory, such as d:arduinolibraries
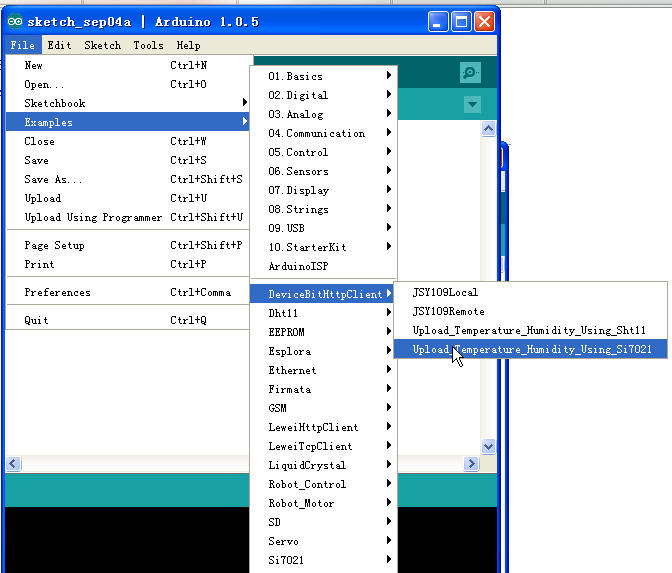
2. Open arduino IDE now,
Select File->Examples->DeviceBitHttpClient->Upload_Temperature_Humidity_Using_Si7021;
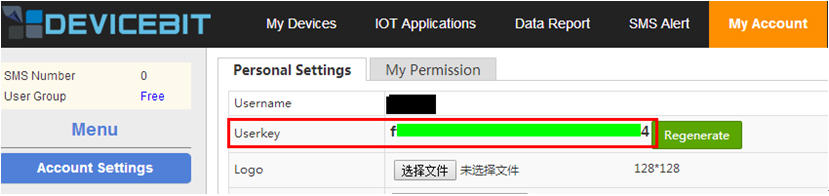
Replace ” #define LW_USERKEY "###############################" “ with your userkey in the user center of DeviceBit My account->Account settings.

3. Connect the wires of Si7021 to the E-KITShield, please refer to the following pictures.


4. Upload codes to E-KIT, and plug network cable to E-KIT. Your sensor’s value should on the website now.

More tutorials later.
Send Twitter
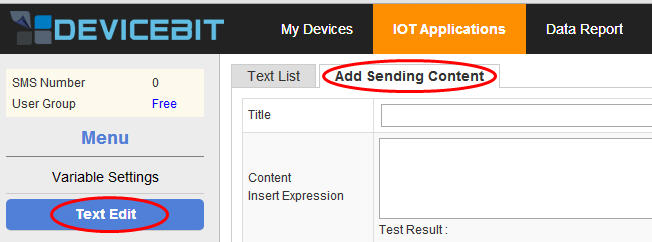
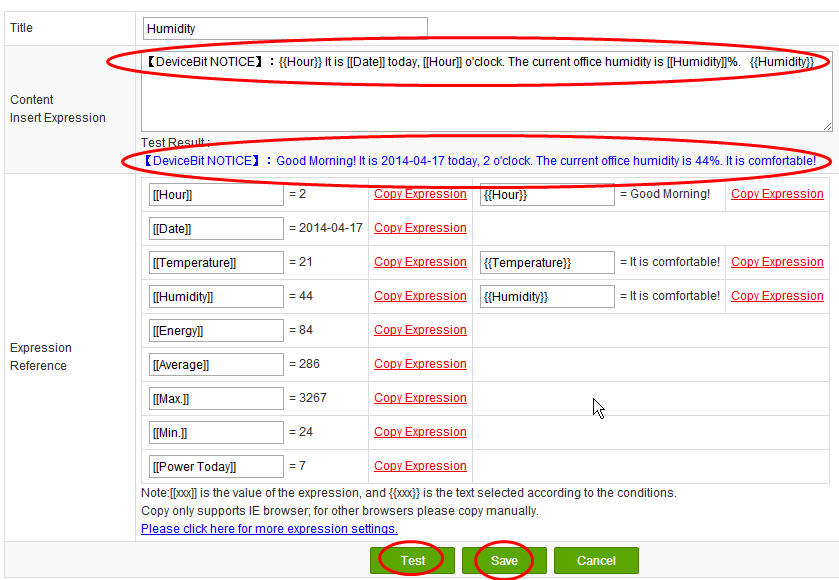
Step 1 Edit text: Click on Text Edit ->Add Sending Content (Please refer to http://www.devicebit.com/dev/docList?cid=0101&sk=76 for details.)
The settings and test result are as follows.
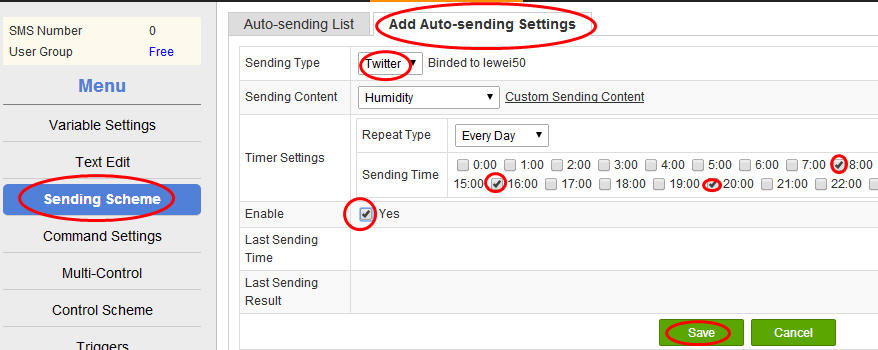
Step2 Set up auto-sending settings. This step is very simple. Click on Sending Scheme ->Add Auto-sending Settings. SelectTwitter for the Sending Type. Select Every Day for the Repeat Type. Tick the time, for example 8:00, 14:00, and 20:00. Then the text content will be sent to Twitter automatically at 8:00am, 14:00pm, and 20:00pm everyday!
The above settings are all completed. Thus, you can see different Twitter sent automatically at the defined time according to different measured values by your Twitter account bound.
Tips:
1 You can monitor the data of your temperature and humidity in real-time by visiting m.devicebit.com via your mobile phone.
2 The data of your temperature and humidity can be sent to Twitter, and daily or weekly reports can be sent to your E-mail.
3 For more practical functions of DeviceBit, please refer to http://www.devicebit.com/dev/doc/167.
For any questions, please contact DeviceBit Customer Service
xujing@devicebit.com, support@devicebit.com
Tel: 0086-10-52981332
Mobile: 0086-13911890238